I started this structure by creating polygons with the "Line" tool in the "Front" view, drawing the polygons I needed for half of the arch, from here I extruded the flat plane to create the depth of the arch.
 I then used a "Symmetry" along the inner side of it to create the whole shape.
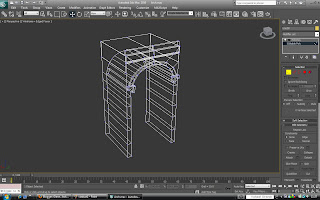
I next made the texture from the default Tiling "Pro" brick materials in 3ds max program files.
C:drive/Program-files/Autodesk/3dsmax10/maps.
These materials are very usefull if set up correctly, I tiled the material using the "UVWmap" modifier "Gizmo" and also changed the angle of it to allow the bricks to not be stretched down the sides of the arch. I applied a bump map using "Mix" where I used the brick image in one channel, and a smoke in the other. The smoke I used to break up the tilling of the material, to create a more organic, realistic look to the material. I adjusted the smokes size, making it quite large so that there are darker and lighter areas over the map.

Next I came out of all the modifiers and copy/pasted the arch many times to create the bridge, I did this after materialising it to make thing allot easier. I created some simple railway sleepers with a wood texture to them with a heavy bump, also the gravel under them was made using a flat square with bumped material.

The gravel material was created by using a cellular channel through the "Diffuse" colour, which I picked as two different shades of brown, and also a very heavy noise bump.

Once I had copy and pasted the railway, gravel and sleepers alone the bridge I took a "Plane" and converted it to an "Editable poly" after applying a high number of iterations to it. I took the grass texture from the 3dsMax "ProMaterials" folder and tiled it across the plane to keep a high level of detail in it. I did this again using the "UVWmap" "Gizmo" resizing the image until I was happy with it and also using the rotation tool, rotated the image so that it was more diagonal. I did this to help aid hiding the straight lines of the tiling.
To hide the tiling even more I applied a "Mix" bump to the material, one Channel I applied the grass material Image again, applied as an "Instance" so the tiling of it is the same. In the second channel I again used a smoke, this helps break up the generic tiling of the texture.


To create the atmosphere and sky I created a sphere, converted it to an editable poly and chopped the bottom off of it to create a cone. I created the colour by applying a "Gradient Ramp" to the diffused light and selected these colours to create an attractive evening sky and applied it to the cone which I placed over the scene.
 Next I wanted to give the scene more atmosphere, so I use a "Fog" effect to add density to the scene. I started by pressing the number "8" on my keyboard which brings up the "Atmosphere and effects" tabs. I applied the fog to the entire scene, adjusting by trial and error its boundaries such as; the fall off of the fog in the vertical also how high it comes in the scene and how dense. I am very happy with its effect in the scene and I think it gives it an even more realistic look in the render.
In this screenshot bellow the scene is shown throught the view of the camera I placed in the scene. The camera has its own tools whilst viewing through it, and this allows me to get a perfect view of what I want too see, and fill the cameras lens making sure everything fits and no edges can be seen. I wanted to animate the movement of the camera, so I set keyframes and moved the camera and set more keyframes, this when played creates a smooth transition from keyframe to keyframe. I used a horrizontal panning shot for this camera, taking inspiration from many videos that I studeid and found this is a very effective motion for calm and relaxing effects.

For the lighting I used Omni lights, these lights give an even glowing distributed light in 360 degrees. I placed one above the horizon line

This render bellow shows the final render, I used a different background here that was an image of sky. I though this suited its evening light, the input of clouds creates mood in the scene. to create the glow that you can see in the final render I added a "Lens effect" "Glow" onto the main Omni. This is a tool that makes the light source itself glow like the sun, or a light bulb, the size of the glow, its intensity, the colour of the glow and its colour fall-off are all adjustable, and need trial and error to get looking acurate.I did not use any other light in this scene, as the dome that I used to cover the scene helps to refract the light boucning it around the scene, also this is a morning animation so low strong lighting is the target.

No comments:
Post a Comment