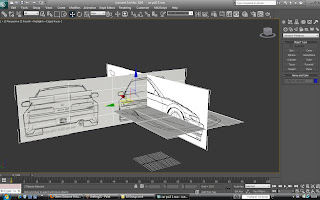
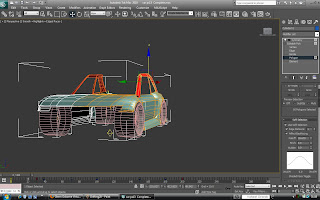
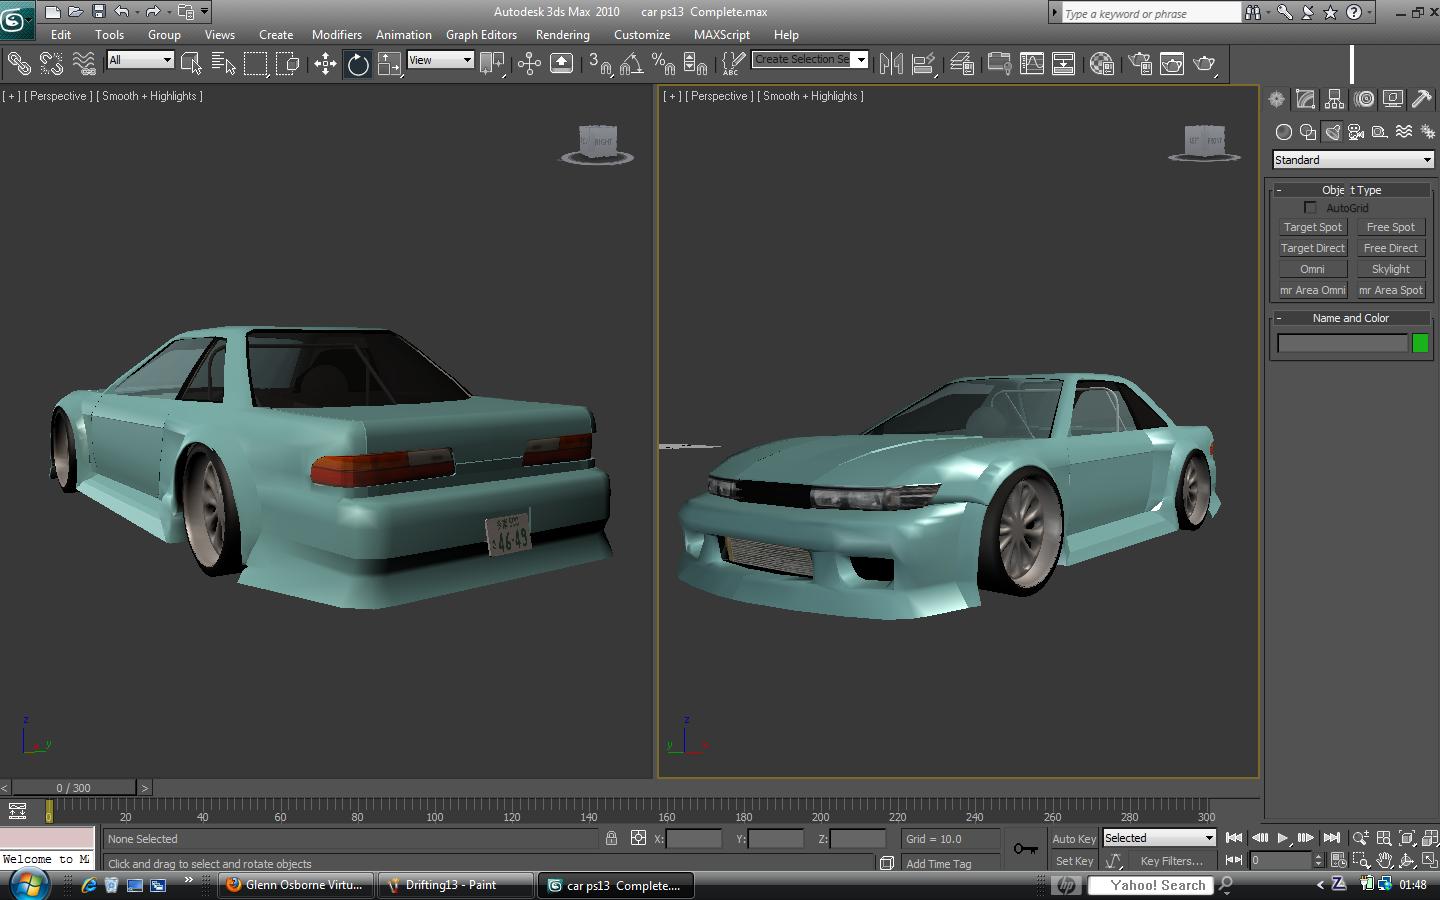
Firstly I started by finding the car that I want to model, I chose an car that is very popular in the scene which is an import from Japan. I managed to find after a long time looking some basic blueprint plans of the vehicle; front, rear side and top. I put these into the scene by creating planes at different angles, then applied the Bitmap images to the planes, and using the "
UVW map" on them and Bitmap Fit to make them come into 3
Dsmax at the correct scale.
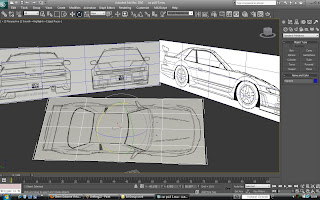
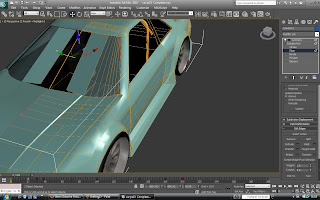
I started the modeling by using flat circles and lines to create polygons, I started at the wheel arch with a circle to get the right shape. From here I used the same technique that I used when modeling the head, and
thats to create flowing lines in the direction of the detail. I placed lines and polygons where they would need to go to create detail in the body work.
I used the Extrude and "
Ctrl-C" tool to produce more polygons, moving further and further over the body work trying to keep as close the the reference planes as possible. I wanted this car to be accurate to the real example, and not just a car that I made up myself, or failed to model i accurately enough so that it is accurate. This picture below shows the bonnet and pulling the polygons over it, a extruded many times over the bonnet to allow me to get the complex compound curves that it has across the bonnet.
I used a "Symmetry" modifier to save myself half the time of not having to model the other side, also it is a perfect copy of the side I am modeling so it is almost 100% accurate.
I started by modeling the side of the car, and as I made these polygons the side was flat, much like the head model. From here I had to pull or push the vertex into the correct position. I did find it very time consuming to get the correct depth of the car in places such as on the
bodykit, roof etc.
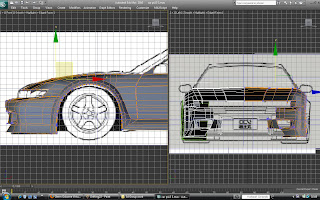
I used the "Bevel" tool which I found very useful. I used it for the window frames and plastic around the window, once I had made the window I just selected it with the polygon tool and beveled it in a little distance and then gave it a slight angle. I did this a couple of time to create a step that's just like that on a window. Before I did this I knew that the windows looked a little disjointed from the car itself, this was a simple effective results.
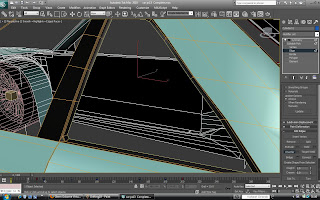
I found making the compound curves of the windows quite difficult, as I did this by eye as my reference images where not suitable. It took a long time of carefully getting the bulge in the window that I wanted, whilst not putting any sharp corners or dents in it.
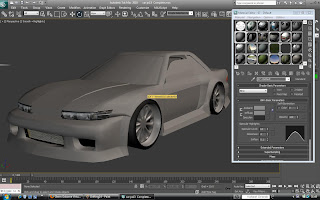
As I was modelling the car, I started to give polygons different "Material
ID's" so to make it more visible to the end result of the car. I set up a "Multi-sub Object" in the materials for this car, I selected the polygon ID I wanted and changed it to suit the car. I made the car light blue as it was easy to work with, the windows with high "Opacity" and frames black.
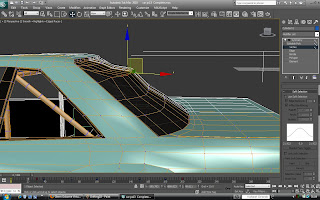
The windscreen was also another time consuming complex curve to achieve. To create a smooth effect between the polygons I selected "Smoothing Groups" I did this by using the polygon tool and selecting an area that I wanted to become smoother, I had to avoid corners and sharp detail that you want to keep as it would smooth these out.
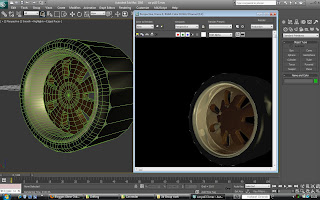
I made a wheel for my car, It started from a a cylinder with the correct iterations to select spokes and for it to match up the other side. I extruded and
chamferd it, finally putting a
turbosmooth on the wheel to give it a smooth shinny finish for its material.
This is the wheel I made,
Unfortunately I could not use this as I tilted it off its axis whilst fitting it to the car, and once this had happened I could not animated it as the centre pivot point wouldn't stay central and the wheel would bob up and down. I asked another student in my group to model a wheel for me, which you can see bellow.
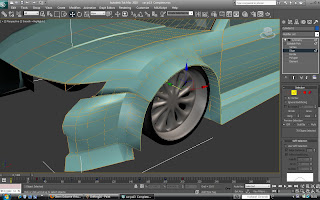
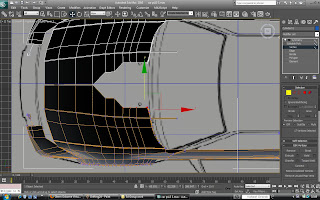
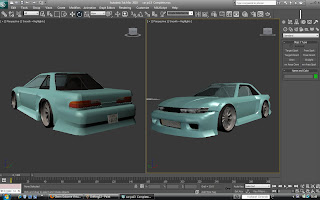
Almost complete here I am continuing to smooth out areas that need it, I created the front bumper here which I pulled and extruded from the front wheel arch and then across the body.
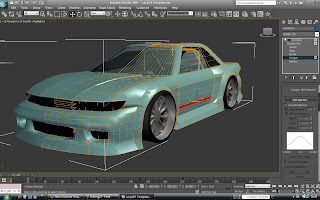
Bellow shows the finished shot of the car, here I have made the lights, grill number plate etc. I made these separately as I wanted to use the "
UVWmap" on them with an image of the lights themselves which I found on the Internet, I then linked the lights to the car.
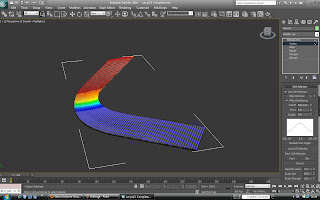
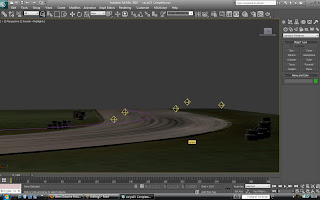
Next I wanted to create the scene that the car was in, trying to ruffly model one exact corner at
Northweald. I used a plane that I then used the "Soft Selection" to bend it into a 90degree corner, this tool keeps the curves nice and smooth.
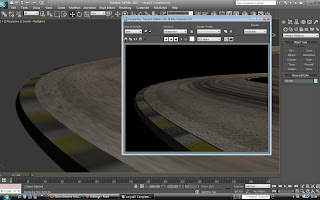
I made two images in
photoshop for this track one for the concrete and one for the apex. I used the brushes to create the skid lines you can see bellow, I used an image of concrete which I then made more organic buy painting it in places in
photoshop.
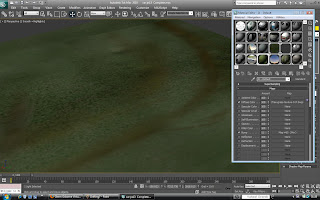
The grass that surrounds this track is an image that I made in
photoshop. I took a stock image of grass and tiled it in
photoshop a couple of times, using the stamp tool and brushes I blended the seams together so it was not noticeable. I took the brush and started to create lighter and darker ares of the grass, the outline of the track I made a dirt brown colour to show ware, also I added from skid lines where it looks like the cars have been off the track.
Here bellow shows the track and the grass together, I am very glad I made the images organically in
photoshop a it really brings the modelling from generic textures to more realism.
To make the car move I linked all the parts to the car
except the wheels. The wheels I needed to make spin continuously on
their own before attaching them to the car. I made a small cube which I placed behind the wheel at the hub, and used this as a pivot point and aliened the two together. I made the wheel rotate using the
keyframes, but to make the wheel spin continuously and loop over and over I went into the "Graph Editor" and made the one cycle of the spinning wheel an "Out Of Range Type" where it continues to repeat. On top of this I straightened the curve of how fast the wheel spun, as the graph makes it speed up and slow down towards the middle of its cycle, so I straightened these curves to lines so the spinning will remain at one constant speed.
From here I then
linked the wheels to the car, and also made a "Line" that goes around the corner, that the car will follow the path. I did this by applying a "Path Constraint" on the car to this line, I
select keyframes at the start and
finish of the line with car at the start and
finish also. When I play this the car moves around the corner whilst the wheels are spinning. I next made the front wheels turn as it is going around the corner, by using
keyframes again on the cube I attached to the wheel, I can spin it and create
keyframes without
interfering with the spin cycle of the wheel itself.
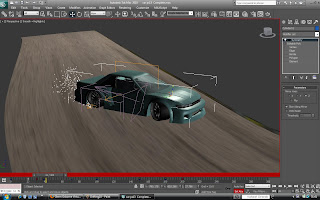
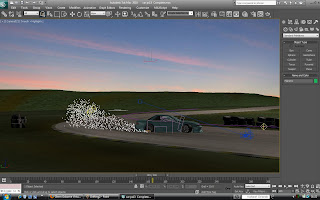
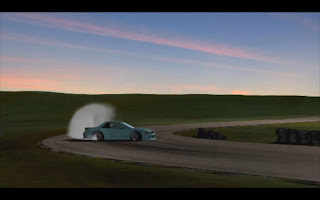
The whole aim of this animation is for the car to drift around the corner, this also means that it needs to create some smoke from the rear tires as they spin up. I selected the "
Particle System" "Super Spray" and within its modifier I selected a "Wind Binding" and "Drag Binding". The
particle system creates the
particles themselves, the the other to are helpers which act on the smoke to make it behave how you want. If i did not use these the smoke would go straight up with no direction at all. The drag binding helps as the car is moving and the
particle system is linked to the car
itl move with it, this helps to act of the smoke like drag trailing it behind. The wind I
adjusted so that it pushed the smoke flat and in the right direction so that it looked like it was coming from the rear tires.

This took almost half a day to set up properly, the number of
variations and settings that are
available are
incredible. As this
Particle system is designed to create all sorts of
particle based
effects not just smoke. To name a few I adjusted the feed rate, size of
particles, how long they
last for, how long they take to grow,
colour, transparency, production rate and many more.
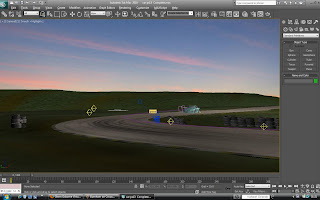
I then lastly added a plane for an image for the sky, and the scene was
complete. I next put in one main light source to the far right of the scene, and then light up the
foreground and
opposite side of the car with 5 more
Omni lights. I also used these to get shadows where I wanted the, and also how much detail was on the tire wall etc. I used
raytraced shadows, with the density of the shadow turned down, and I selected a slightly
lighter colour than
black for the shadows.
I placed two cameras into the scene, one at long range and the other up close. My plan is to cut between the two as the car drifts around the corner. I animated the closer camera by making
keyframes and then moving the camera to follow the car. I
initial selected the "Target" of the camera ans "Linked" it to the car, which makes the camera follow it nicely, but I
preferred the manual movement as it looks more natural and organic.

Here below shows some finished renders of the car in motion, and the
particle system working really well, I am very happy with the results.


 I wanted to create a realised foreground and sand, as often just bitmap images look quite poor and lifeless. So I decided to model pebbles and stones from cylinders, changing their shape and making them flatter, rounder etc. I was unsure of how to materialise these, as just a gradient may not work so well, I found an image of a sunset which mainly consisted of browns and oranges with small highlights in areas, I tried it on the pebbles and it work perfectly.
 The bitmap gives good colour variance when wrapped around the sphere.


 Again I added the lens effect "Glow" as in the other scenes. This especial works well over water as the water has "Rraytraced" reflections on it. I placed the camera in the similar position to that in the referenc photo.


 I made a wheel for my car, It started from a a cylinder with the correct iterations to select spokes and for it to match up the other side. I extruded and chamferd it, finally putting a turbosmooth on the wheel to give it a smooth shinny finish for its material.
 Almost complete here I am continuing to smooth out areas that need it, I created the front bumper here which I pulled and extruded from the front wheel arch and then across the body.
 I made two images in photoshop for this track one for the concrete and one for the apex. I used the brushes to create the skid lines you can see bellow, I used an image of concrete which I then made more organic buy painting it in places in photoshop.


